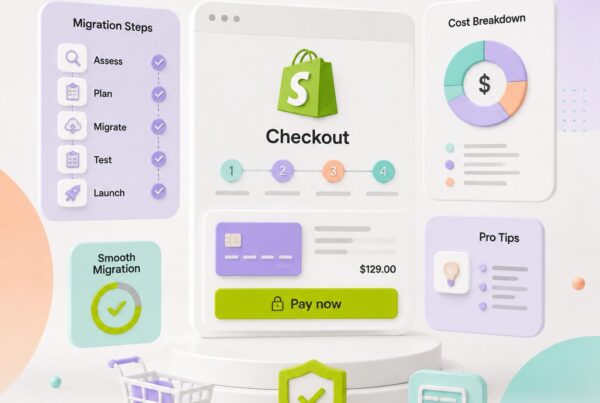

Moving your online store to a new platform is one of the riskiest projects an ecommerce business can take on. A single missed step can break checkout, wipe out order history, or tank years of SEO rankings overnight. That’s why a detailed Shopify migration checklist isn’t optional. It’s the only thing standing between a smooth transition and a launch-day disaster.
Whether you’re moving from WooCommerce, Magento, BigCommerce, or a custom-built platform, these 12 steps walk you through every phase of a Shopify migration: planning, setup, data transfer, SEO protection, testing, and launch.
You might be interested in:
How to Choose a Shopify Migration Agency (2026 Guide)
How Much Does Shopify Migration Cost? (2026 Guide)
Why a Shopify Migration Checklist Matters
Ecommerce platforms don’t work the same way under the hood. Product structures, tax rules, discount logic, and URL formats all differ from platform to platform. Without a migration plan, assumptions from your old system quietly break things in the new one, usually right when customers are trying to check out.
A good checklist protects three things: your data, your search rankings, and your revenue. Skipping steps rarely causes problems immediately; issues tend to surface later, during testing or after the store is already live.
Shopify Migration Checklist: 12 Steps for a Safe Store Move
Here is the 12 steps list you must follow in 2026 when you are migrating to Shopify.
- Audit Your Current Store
- Set Clear Migration Goals
- Freeze Store Changes
- Choose Your Shopify Plan and Theme
- Configure Store Settings
- Install and Test Core Apps
- Migrate Products and Collections
- Migrate Customers and Order History
- Reconnect Integrations
- Set Up Redirects and Protect Your SEO
- Test the Full Customer Journey
- Launch and Monitor Post-Launch
Step 1: Audit Your Current Store
Before you touch anything, take full inventory of your existing site: products, collections, customer accounts, order history, blog content, apps, integrations, and custom code. Export a complete list of your live URLs, since you’ll need this later for redirects.
Step 2: Set Clear Migration Goals
Define why you’re migrating and what success looks like. Are you after better checkout conversion, lower app costs, or scalability for growth? Documented goals keep the project from expanding beyond its original scope, which is one of the most common reasons migrations run over budget and past deadline.
Step 3: Freeze Store Changes
Stop making edits to your live store once the audit is done. A content freeze, typically 48 to 72 hours before cutover, ensures the data you migrate is the final, verified version, not a moving target.
Step 4: Choose Your Shopify Plan and Theme
Pick the Shopify plan that matches your order volume and feature needs, then select and customize a theme. Getting the visual foundation right before data arrives makes every later step easier to verify.
Step 5: Configure Store Settings
Set up taxes, shipping zones, payment gateways, and checkout rules. This is the operating environment your business will move into, so build it fully before anything gets imported.
Step 6: Install and Test Core Apps
Add the apps you rely on for reviews, subscriptions, loyalty, or shipping calculators, and confirm each one works on a blank store before you introduce real data.
Step 7: Migrate Products and Collections
Import products before collections, since collections often depend on product data already being in place. Double-check variants, images, pricing, and inventory counts after import, as migrated content frequently breaks in subtle ways, especially with HTML descriptions and variant images.
Step 8: Migrate Customers and Order History
Migrate customer accounts before orders, so order records can link correctly to customer profiles. Confirm that order statuses, refund history, and customer tags carried over accurately.
Step 9: Reconnect Integrations
Reconnect ERP, CRM, email marketing, and fulfillment integrations. Test each connection individually rather than assuming they’ll sync correctly on their own.
Step 10: Set Up Redirects and Protect Your SEO
This is the step most migrations get wrong, and it’s the one that does the most damage when mishandled.
- Map every URL from your pre-migration crawl to its new Shopify equivalent.
- Set up 301 redirects under Online Store, Navigation, URL Redirects.
- Preserve titles, meta descriptions, headings, image alt text, and internal links on your priority pages.
- Update your XML sitemap and resubmit it in Google Search Console.
- Check that structured data (schema markup) transferred or was rebuilt correctly.
Skipping redirects doesn’t just create a bad user experience. It can wipe out rankings you’ve spent years building, turning your new store into a 404-filled site overnight.
Step 11: Test the Full Customer Journey
This is where your Shopify migration checklist earns its keep. Testing catches the silent errors that don’t show up until real customers hit them. Test your store the way a real customer would, and then the way a developer would.
- Complete a full purchase, including discounts, shipping, and taxes.
- Test on mobile and across major browsers.
- Verify email notifications (order confirmation, shipping, password reset).
- Check page speed and Core Web Vitals.
- Confirm redirects actually resolve to the correct pages, not just the homepage.
Step 12: Launch and Monitor Post-Launch
Go live during a low-traffic window, and keep DNS changes on hand in case you need to roll back quickly. In the days after launch:
- Monitor Google Search Console for crawl errors and dropped pages.
- Watch for spikes in checkout abandonment, which often signal a broken redirect or payment issue.
- Announce the new store across email and social channels, with clear instructions for password resets.
- Keep your old platform accessible (read-only) for a few weeks as a safety net.
Common Shopify Migration Mistakes to Avoid
- Migrating products before setting up the store structure.
- Forgetting to redirect category or collection pages, not just product URLs.
- Rushing the testing phase to hit a launch date.
- Not backing up the old store before decommissioning it.
- Ignoring mobile checkout testing until after launch.
Frequently Asked Question About Shopify Migration
How long does a Shopify migration take?
Most stores need anywhere from 4 to 12 weeks, depending on catalog size, number of integrations, and how much custom functionality needs rebuilding.
Will I lose my SEO rankings during migration?
Not if redirects, metadata, and site structure are handled correctly. Ranking drops usually come from missing 301 redirects, not the platform switch itself.
Can I roll back after migrating to Shopify?
Shopify doesn’t support a full rollback once you’re live, which is why keeping your old platform accessible read-only is a common safety net during the first few weeks.
Final Thoughts
A Shopify migration rarely fails because the process is too complex. It fails because small, unglamorous steps get skipped under time pressure. Following a complete Shopify migration checklist from start to finish, rather than working from memory, is what separates a smooth launch from an emergency fire drill. Work through these 12 steps in order, resist the urge to rush the testing phase, and treat your SEO redirects as seriously as your data migration. Do that, and most of the problems that sink ecommerce migrations simply won’t come up.